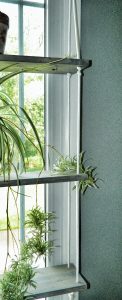
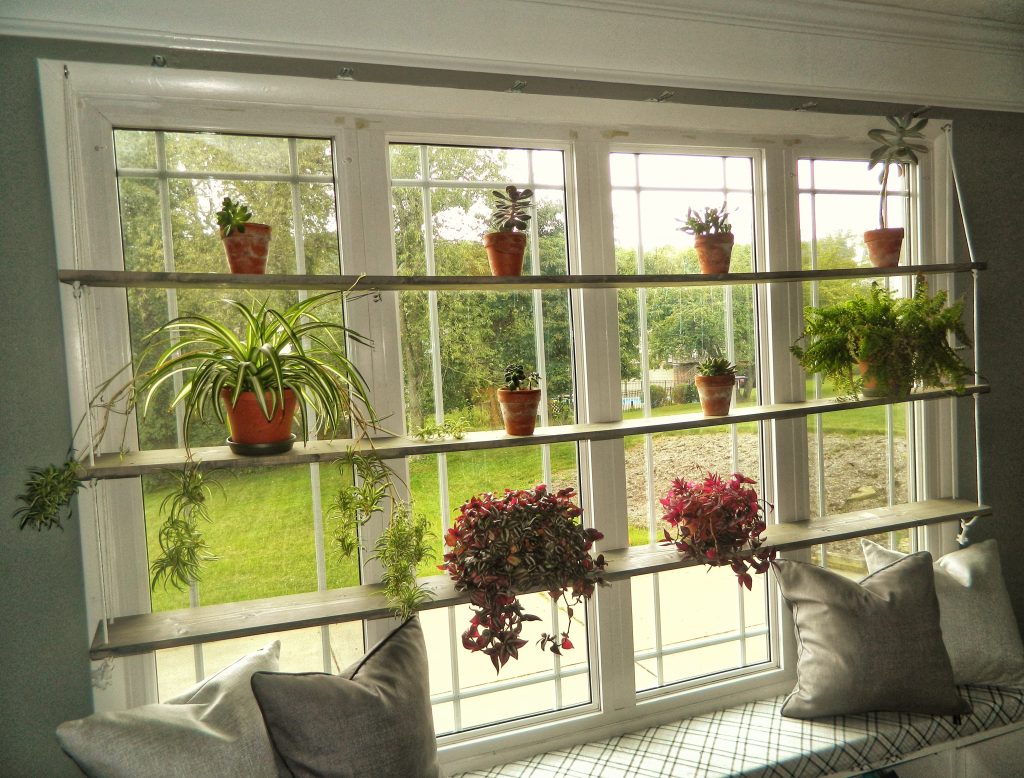
This perfectly imperfect window treatment is such a unique and beautiful alternative to traditional blinds and curtains. We get so much natural light from this large window in our family room that I couldn’t imagine covering it up. However, I also desire some privacy. These shelves can obviously be used in countless ways, but live plants were the exact accents to compliment the color and style of the room. I actually completed this project without any additional assistance in only a few hours!
MATERIALS/TOOLS
3 1×6 White Pine Boards (Cheaper to buy the longest length and have the hardware store cut them for you at no charge)
Have hardware store cut each board to length of your window’s width. (My window is about 95 inches wide including the molding, so each board is 1 x 6 x 94.5 inches).
Sand all sides of each board, as well as the edges until you can run your hand over without feeling anything sharp.
Wipe with a dry rag to remove the dust.
Shake stain vigorously before opening to mix the colors. Brush board in long smooth strokes. Do top and sides as quickly and carefully as you can.
Take a clean rag and rubover stain as you did with the brush, making sure to wipe off all stained areas. (If the color is too light for your taste, do another coat of stain and immediately wipe with a rag again).
Once that side is dry, flip over and repeat step 6 on the unstained side.
Let dry.
Use new brush and saturate it with the Polycrylic finish. Brushover stain in smooth strokes on all sides of the board.
Let dry and repeat.
Repeat steps 6-11 on all boards.
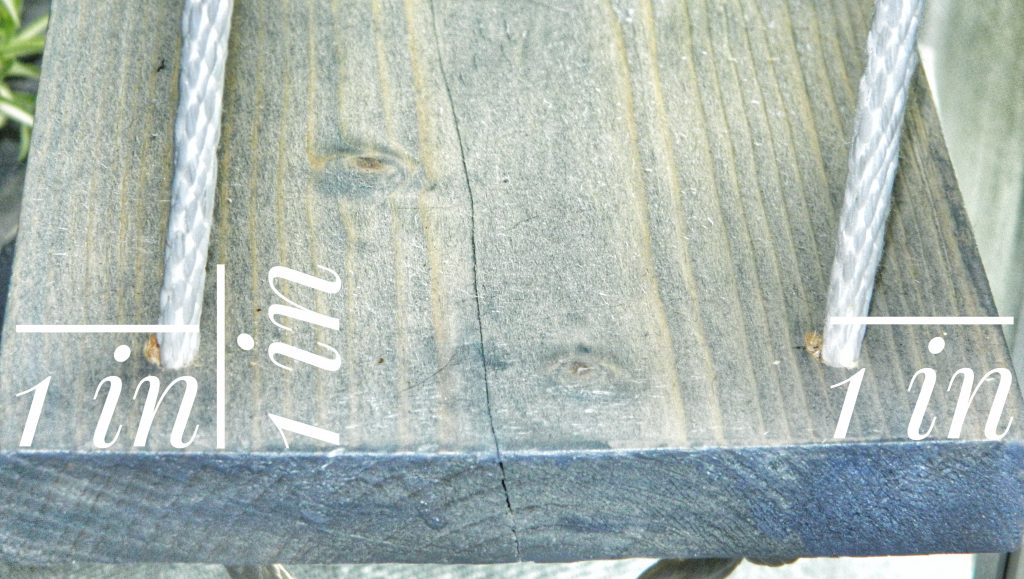
Once finish is completely dry, measure 1 inch from each edge of boards and mark2 holes on each end.
Drillholes on each end of all boards with 1/4 inch drill bit. Pull out and push in a few times to make a smooth hole to pass the rope through.
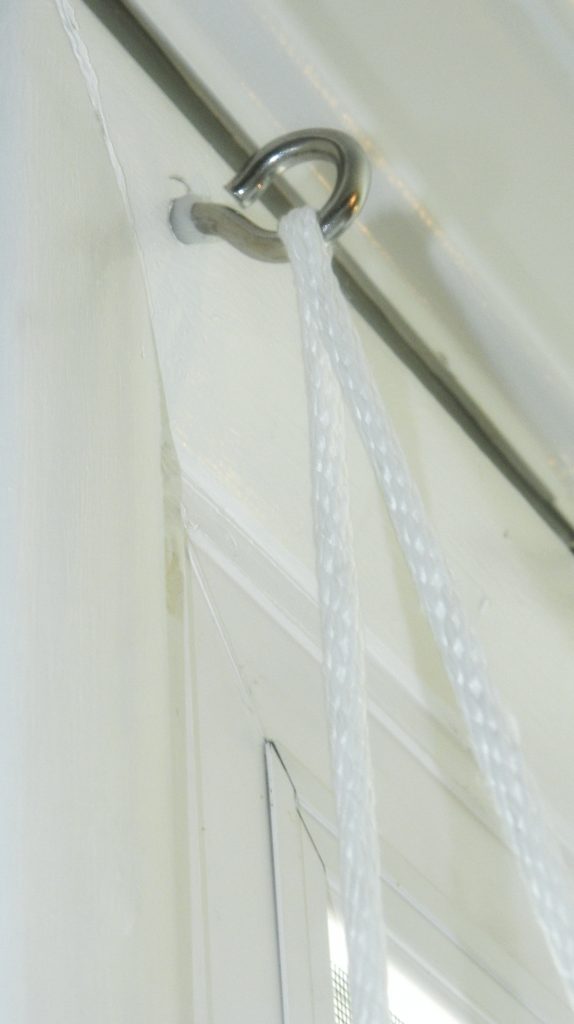
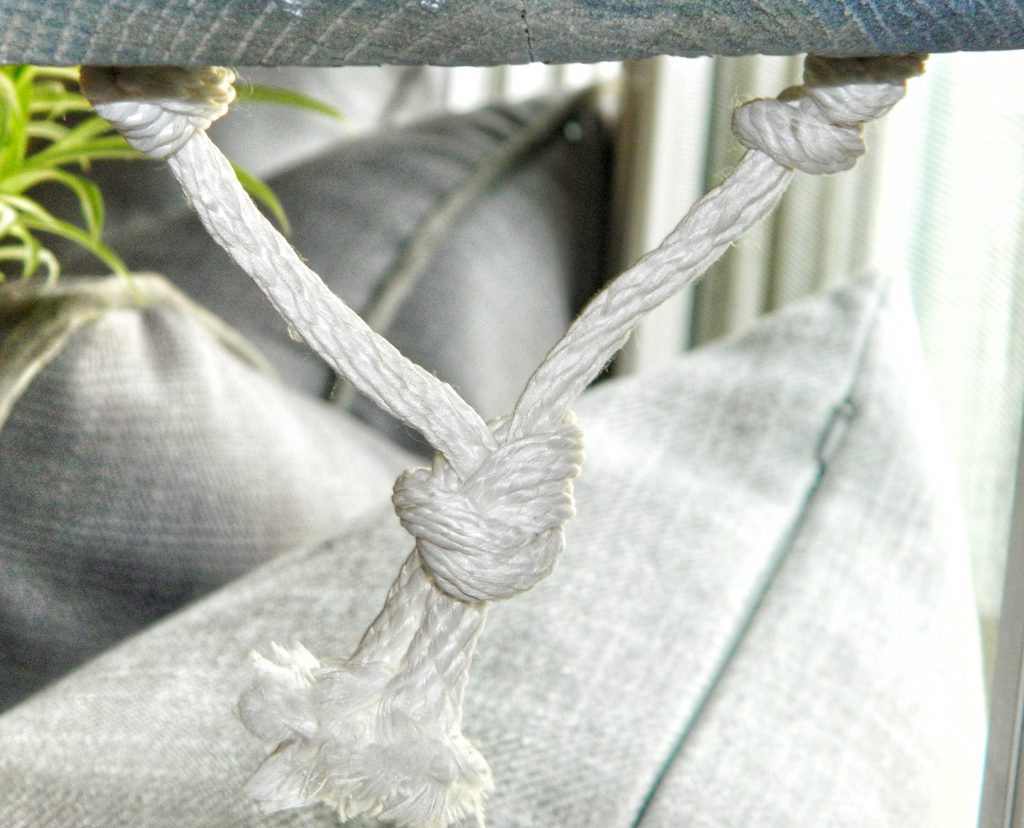
Pass rope through eye hook so that there are 2 even pieces hanging down. Pull down and measure the length you want the bottom board to hang. Add another few inches to allow for knots, and cut.
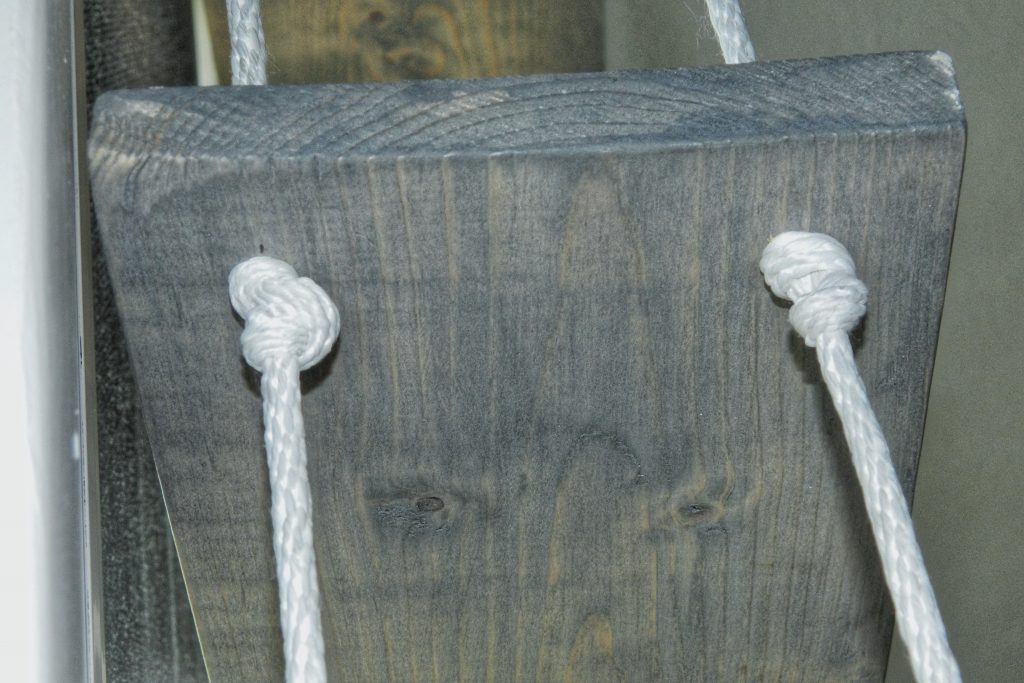
Feed rope through both holes of the top board and double knot directly under holes. Make sure to place board at your desired height. Do one side at a time.
Repeatwith each board, doing one side at a time, and placingboard at correct height before tying the knots.
After knotting the bottom board, bringboth sides of the rope together and tie a large knot about 2 inches below the board.
Decorate as you like and enjoy your newly decorated window!
Did you try this project? Please leave any comments or suggestions below!