BY Elizabeth Scafuri
PUBLISHED 8/6/2019
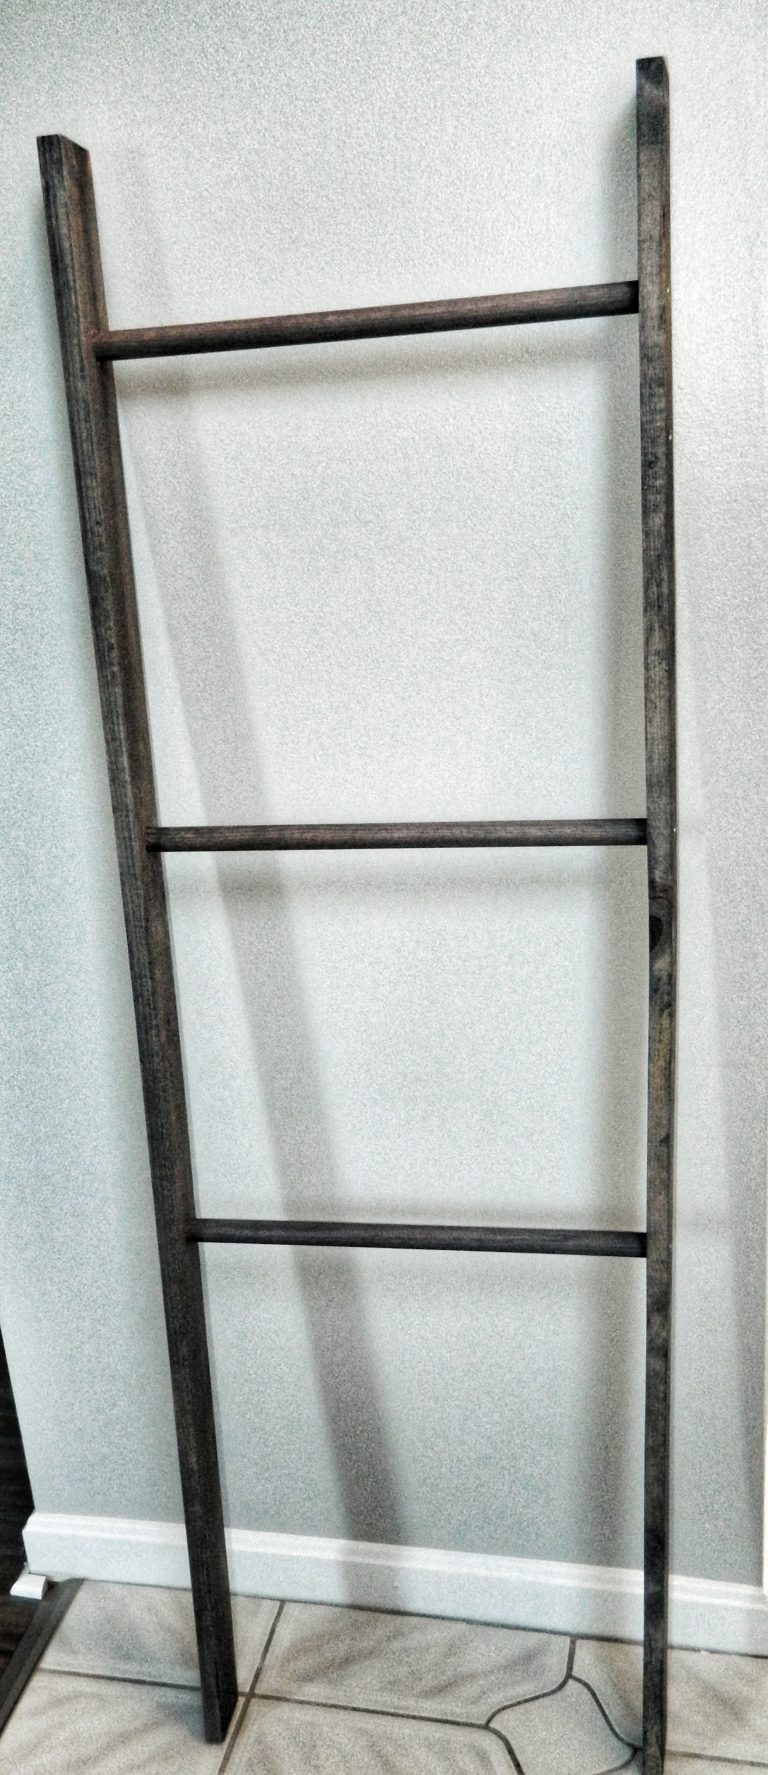
I am in love with this perfectly imperfect decorative ladder! I made this for my husband for Father’s Day (including the photographs) which are shown below. It was incredibly easy to build, with very little time required to complete. PLUS…..building this ladder will save you up to $50 by not purchasing a similar version already made.
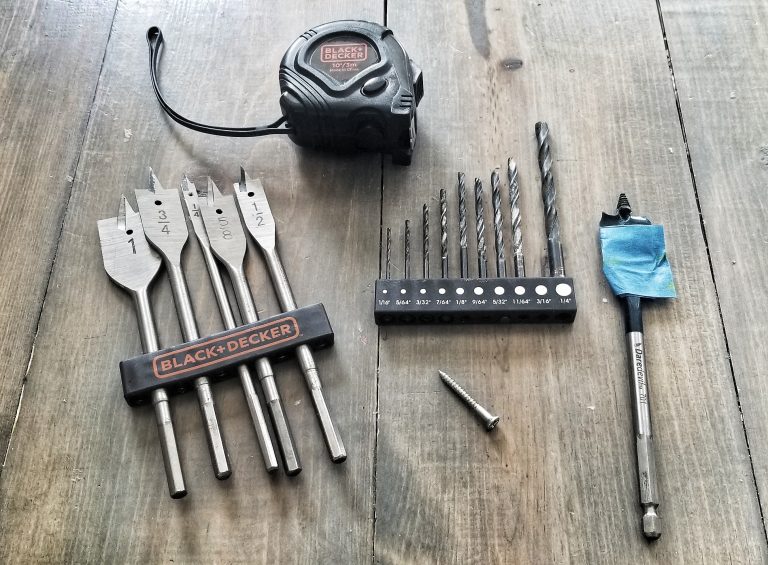
MATERIALS/TOOLS
- 2 1x3in x 6ft Common Boards (Have the hardware store cut each board to 60in long).
- 2-3 7/8in x 36in dowels (cut in half – about 18in long)*
- 1 box 1 1/4in Wood Screws
- 1 8 oz can Interior Stain Wood Finish in “Classic Gray”
- 1 8 oz can Polycrylic Protective Finish in “Clear Matte”
- 2 Paint Brushes
- Course Sanding Sponge
- Chop Saw
- Power Drill
- 7/8 inch Spade Bit
- 1/8 inch Drill Bit
- Tape Measure
INSTRUCTIONS
- Measure each dowel and make a mar at the exact halfway point *(the tag will say they are 36in long, but usually it will be a bit shorter so don’t make 18 in. cuts before making a true measurement).
- Using a chop saw (or hand saw if you’re strong enough) cut each dowel into 2 equal length pieces.
- Sand both boards on all sides and edges until smooth enough to run your hand over.
- Sand edges of the dowels.
- Wipe all pieces with a dry rag to remove the sanding dust.
- Shake can of stain vigorously before opening to ensure the color is completely mixed. Carefully dip a brush into stain to saturate and run along edge to prevent drips.
- Brush the top and sides of 1 board in smooth strokes. Immediately after, wipe all stained areas with a rag. (If the color is too light, repeat staining and wiping again.)
- Once dry, flip the board over and repeat Step 7.
- Stand each dowel upright holding the top edge to stain and wipe all the way around. (The edges do not need to be stained since they won’t show.)
- After all stain is dry, use a clean brush to apply the Polycrylic coat. Shake can before opening. Brush a thick coat in long, smooth strokes. Allow to dry.
- If doing 5 rungs, mark each board at 8 in, 19 in, 30 in, 41 in, and 52 in. The dowel will be 8 in from the top and bottom, and 11 in apart. (If only doing 4 rungs, keep the top and bottom to 8 in from the edge and measure to make sure each other rung is even distance apart.)
- Drill a hole at every mark using the 1/8 in Drill Bit.
- Using the Spade Bit, drill at each hole to 1/4 in deep. Place a piece of Painter’s Tape at 1/4 in from the point of the Spade Bit to make sure you don’t go too deep.
- Drill 1/2 in deep holes into the center of each end of all dowels with the 1/8 in Drill Bit.
- Place 1 end of a dowel into the large hole of 1 of the boards. Drill a screw from the outside of the board into the dowel’s pre-drilled hole. Repeat this step until all dowels are secured into 1 board.
- Lay the board onto the floor so that the dowels are facing upwards. Carefully place the other board onto the dowels so that each one lines up with the holes of that board.
- Drill screws into the other side of the board into the pre-drilled holes of the dowels as you did before.
- Stand the ladder upright and decorate as you like!