PUBLISHED: 10/16/2019
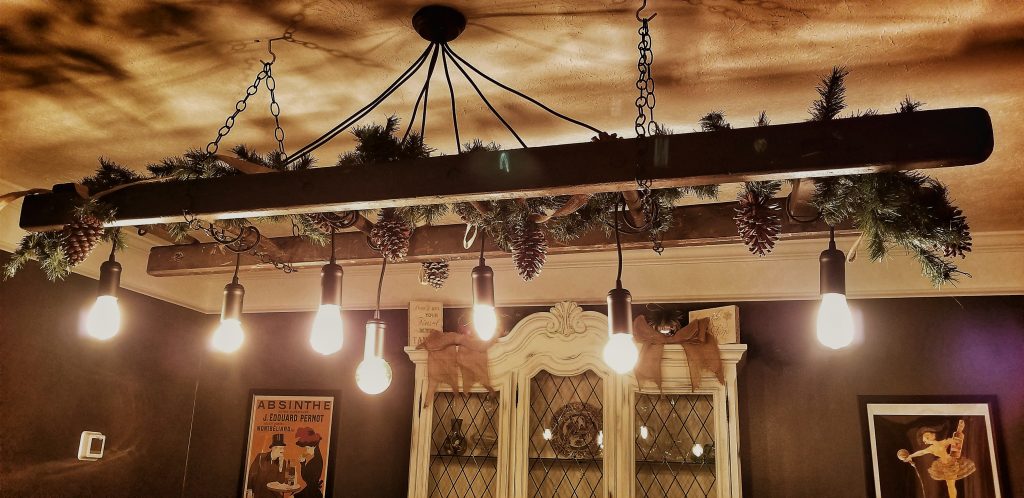
This simple Chandelier is a wonderfully unique way to update or enhance your Dining Room lighting on a budget. It is Perfectly Imperfect because this look can be adjusted to fit every style and every season. It entices with a rustic appeal yet simple elegance that is sure to be a conversation started at every dinner party!
materials/tools
- Old Ladder*
- Sanding Sponge
- Interior Wood Stain (I used Espresso)
- Paint brushes
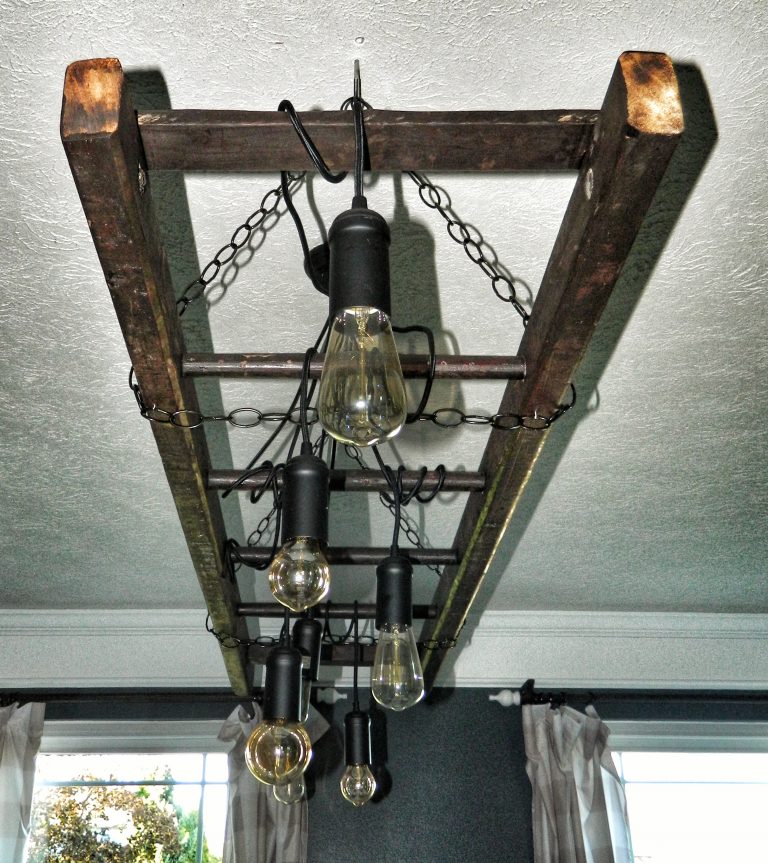
- Metal Chain (the lower you hang the ladder, the more chain you will need)**
- 2 Steel Screw Hooks***
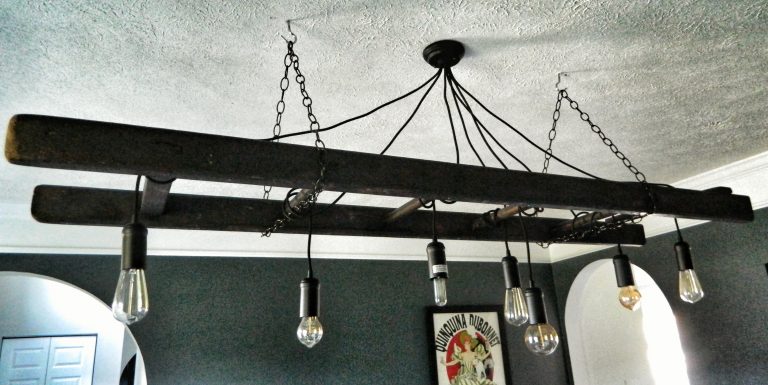
- Pendant Lighting****
- Edison Bulbs in various sizes and shapes
*I found my ladder at an antique store for less than $30. It was obviously old and not in the best shape, but that was the look I wanted. I sanded away the damaged wood and any paint splatter, etc. You can also use a blanket or decorative ladder for this project as well if you don’t want to bother with the whole antique makeover.
**Make sure to use chain that can hold a decent amount of weight. The weight will be even between the two chains so it doesn’t have to be heavy duty, but I wouldn’t recommend using anything but metal.
***Again, check the holding weight of the hooks before you buy to make sure they can support some weight. And each hook only needs to be able to hold half the weight of the ladder.
****The options for Pendant Lighting are incredible and they are available from many stores and online. Mine is the exact model from the link, and I researched to find the best deal. Pay attention to the length of the individual lighting strands to ensure they are long enough to wrap around your ladder at the different rungs.
instructions
- Sand your Ladder. Make sure to sand all edges until smooth as well as any damaged areas of the wood. Use a dry cloth to remove all the dust before staining.
- Stain the Ladder. (I wanted a darker shade of the stain, so after applying the first coat I did not use a rag to wipe away any of the stain.) Make sure when staining to use a brush and apply in long, smooth strokes – covering every rung and edge. Allow to dry between coats if you are applying more than one. (My intended look is very rustic so I didn’t use any Polyurethane top coat either.)
- Connect and hang your Chandelier. I recommend using someone qualified for this part! I am lucky to have an electrician in the family to have helped me install mine 🙂
- Install the Screw Hooks at equal distances from the center of the Chandelier plate. You want to place them where the outer rungs of the ladder will be in order to provide the best support. *It is best to screw them into ceiling studs, but if you can’t, use a wall anchor large enough to support the dimensions of the Hooks, and twist until only the smooth part is exposed.
- Hang each Chain in a triangular shape around the Ladder at both ends so that the Ladder is secure and the weight distribution is even. (The less chain the higher the ladder will hang.)
- Wrap the Pendant strands around the rungs so that they hang at different lengths.
- Install the light bulbs and admire your new Ladder Chandelier!!
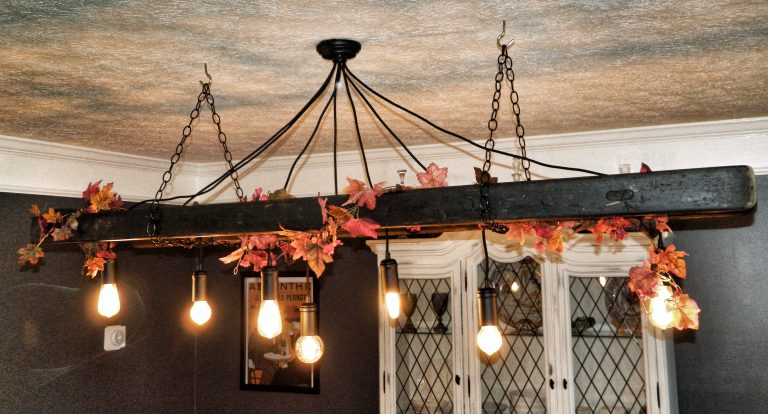
Decorated for Thanksgiving

Did you try this project? Please share any comments or suggestions below!!