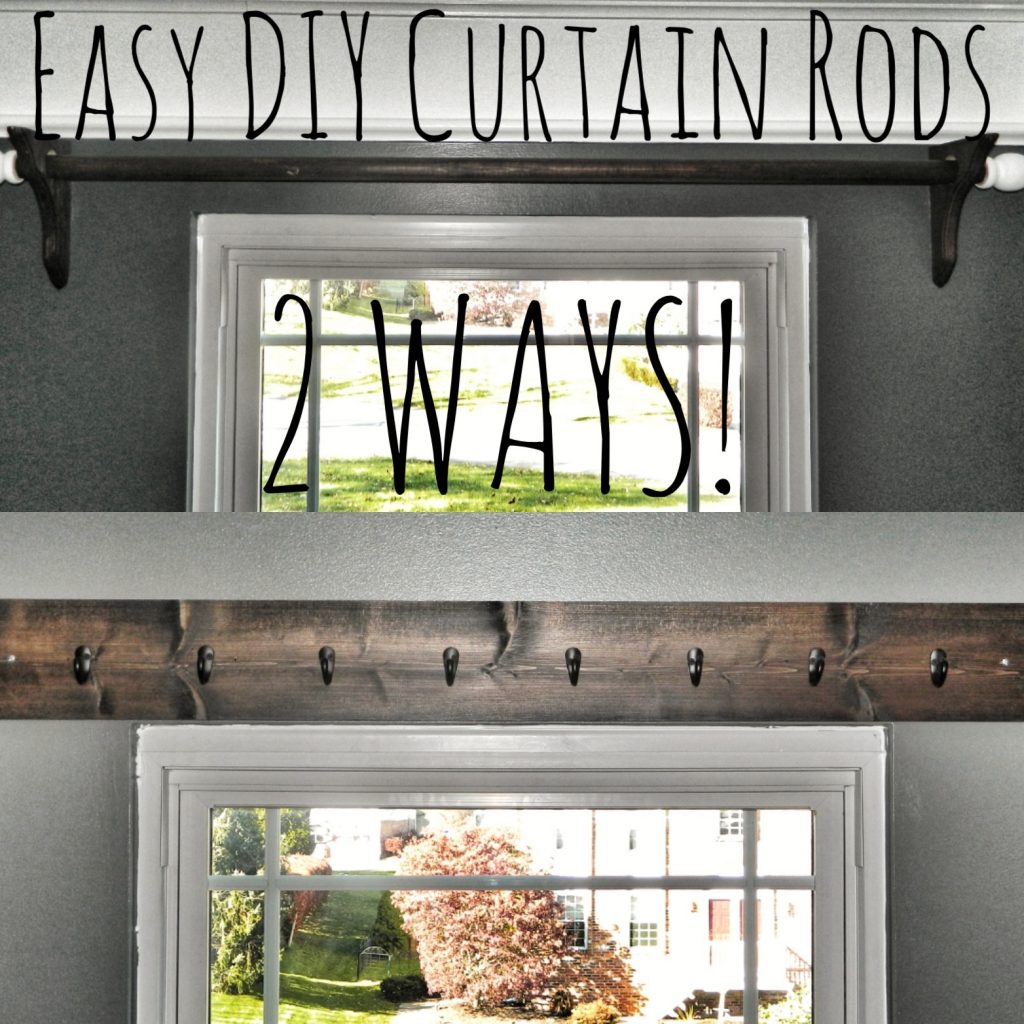
Our new house had all outdated, plastic sliding blinds over all the windows. When I began looking for new window treatments I was shocked at how expensive just a curtain rod was. So, I decided to make my own! I tried a few different styles throughout the house and I love them. Here are 2 incredibly easy, cheap and Perfectly Imperfectways to save a ton of money and still make your windows look fabulous!!
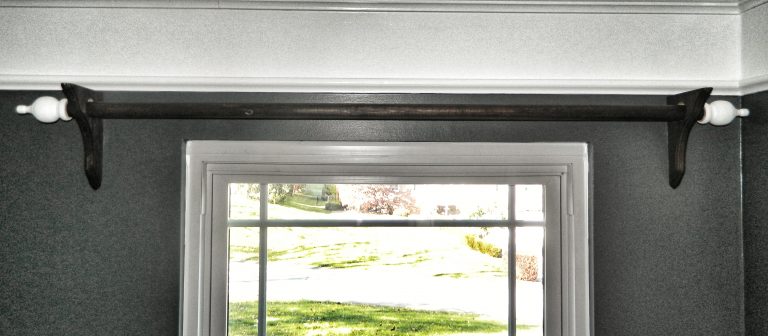
Traditional Curtain Rod
matierals/tools
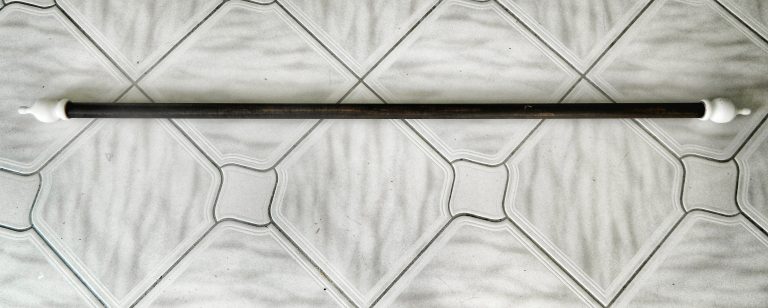
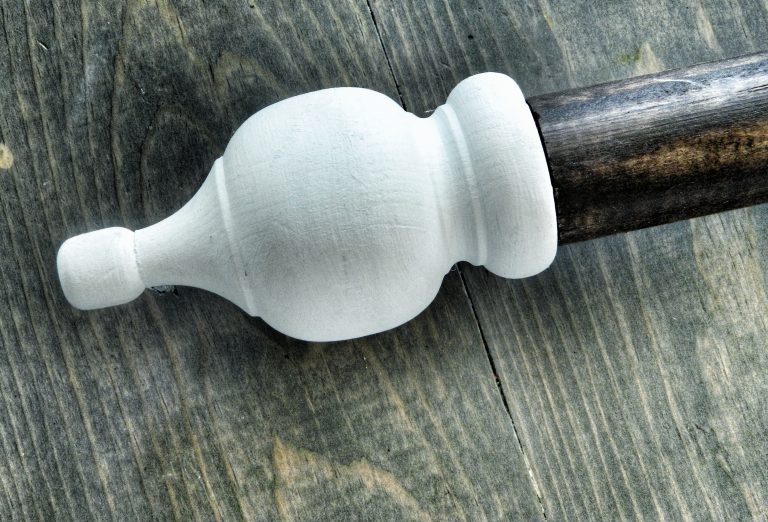
2 1 1/4 in. Dowels aka Rods (mine are cut 16 in. longer than the width of the window at 51 in. each)*
Rod Caulk Gun (must have this to use the Adhesive)
Painter’s Tape
* The hardware store will cut Dowels this thick on site for free. Anything smaller than 1 in. diameter will splinter and you will have to cut it yourself. It is up to you where you want to place the Rod and Corbels with respect to the window. I chose to add 8 in. in length to the Rod for each side of the window.
**You can paint and/or stain the Rods, Finials, and Corbels however you like. I used:
Interior Stain in “Espresso” for the Rods and Corbels
Valspar Chalky Paint in “Kid Gloves” for the Finials
instructions
Stain or Paintthe Rods, Finials, and Corbels. When staining, make sure you use a brush to make long, even strokes with the grain to cover. Then use a dry rag to wipe off any stain that doesn’t absorb. Repeat the process if the color isn’t deep/dark enough. (I stained the Rods and Corbels, and painted the Finials. I also chose not to use any finish in order to keep a very rustic look.)
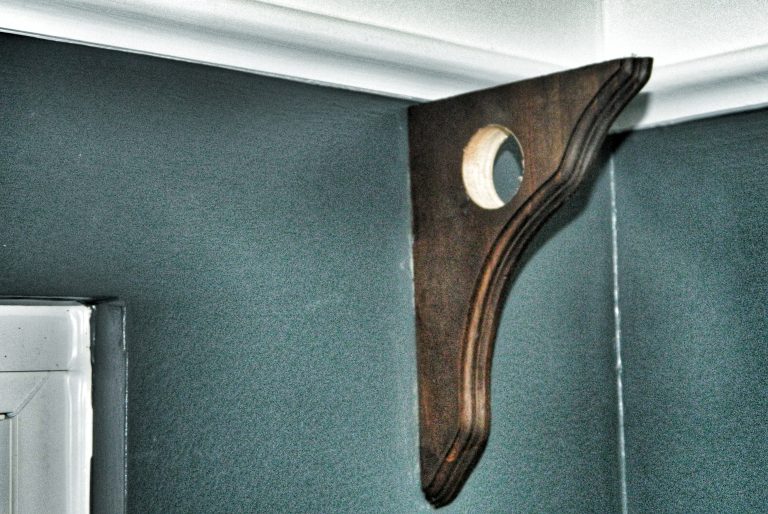
Useyour Drill and Hole Saw bit to make holes in the Corbels. Place a spare piece of wood underneath before drilling. Mark the center of the hole 2 1/2 in. from the long, wall-side of the Corbel, and 1 1/2 in. down from the top. Make sure not to drill too close to the front edge! (Tip: Use a vice to hold 2 Corbels together while you drill so you can mark the next one perfectly, once you completely pierce through.)
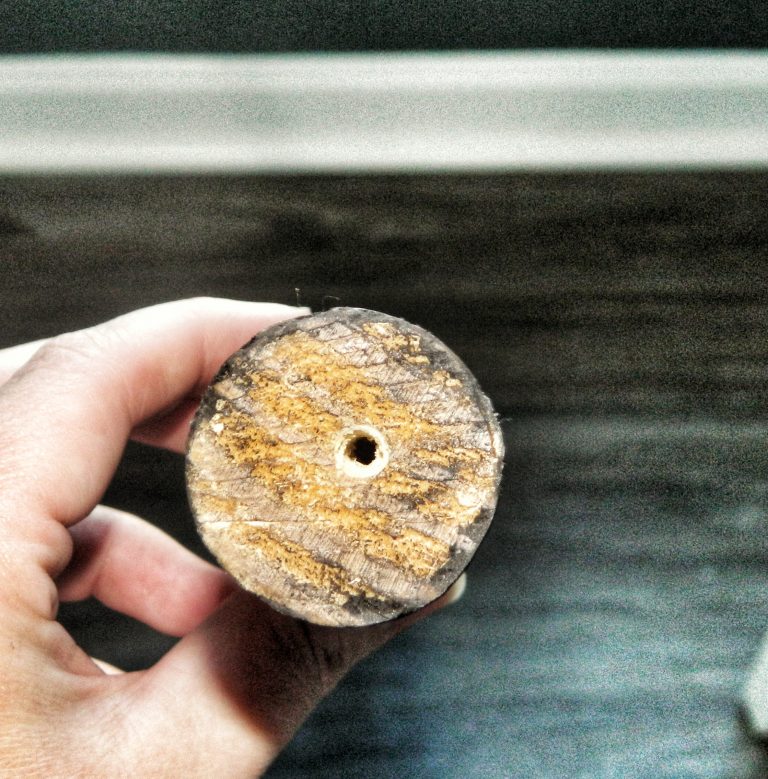
Mark the center of each end of the Rods and drillabout 1/2 in. deep with the Bit.
Mark your wall where you want to place the Corbels on each side of the windows. Allow for 1 in. of the Rod to go through the Corbels so you can attach the Finials with wiggle room. (I placed mine 7 in. to each side and 4 in. above the window edge. This creates higher ceilings once you hang the curtains.)
Squeeze a thin line of Adhesive to the back side of the Corbels and place them where you marked. Holdfor a few minutes and apply constant pressure. Wipe offany extra that may seep out. Then usePainter’s Tape to keep them in place so there is no sliding in any direction. Allow 24 hours to fully adhere.
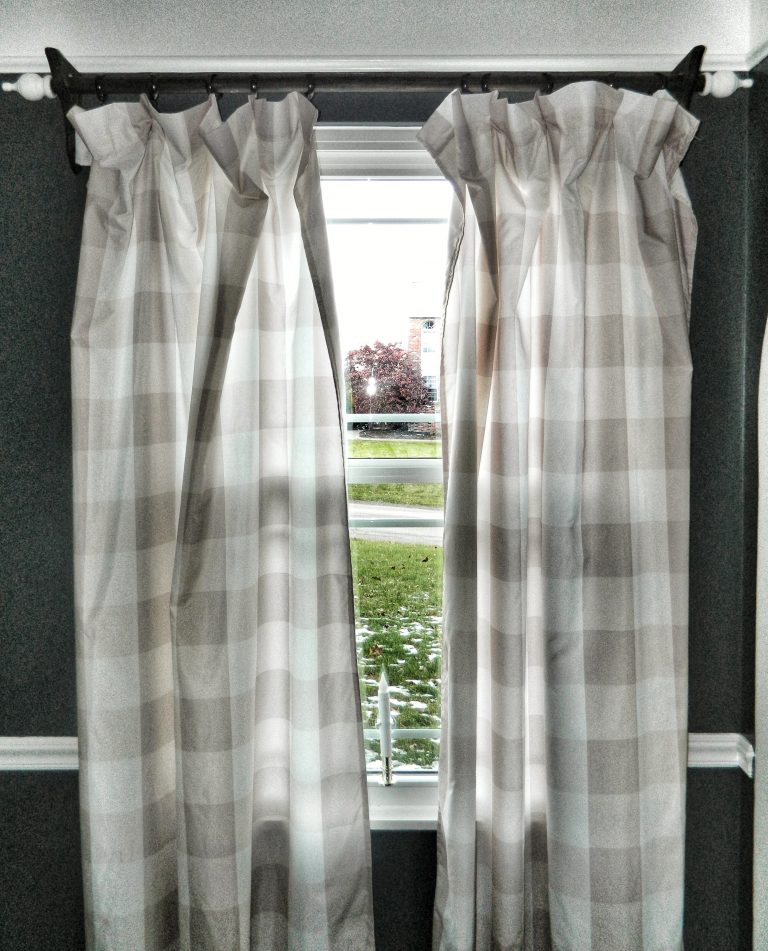
Hang Curtain Rings that are at least 1 in. diameter or a Curtain with 1 in. Grommets. Slide the Rods through each hole of the Corbels and finish by twistingthe Finials into the pre-drilled holes.
Step back and admire your awesome, Self-made Curtain Rods!!
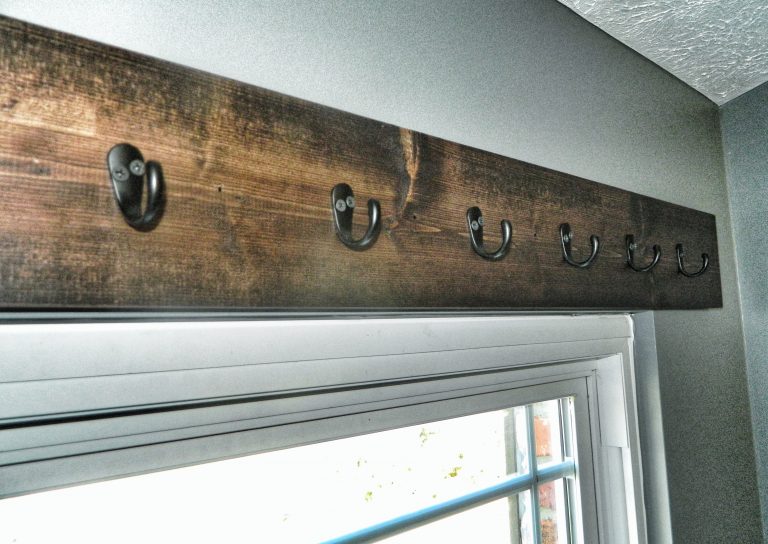
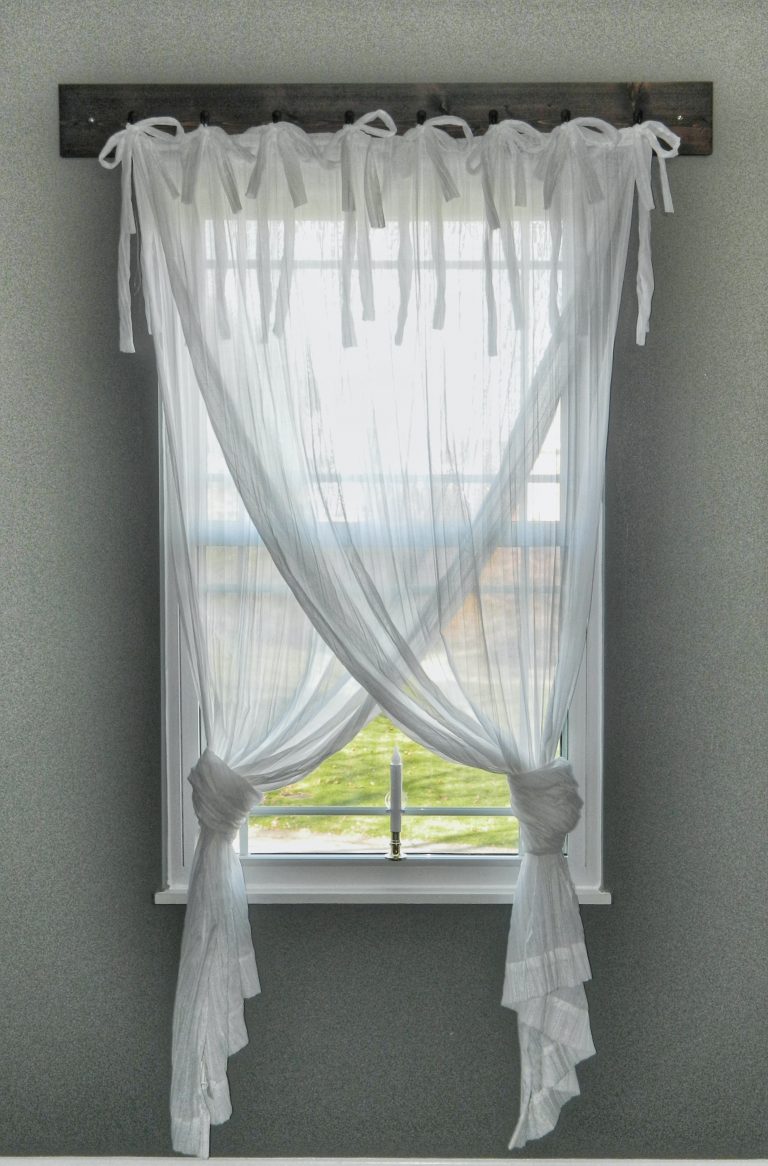
Closet Hooks (make sure to have 1 for each tab on the curtains)
Drill
Drill Bit
Tape Measure
Screw Driver
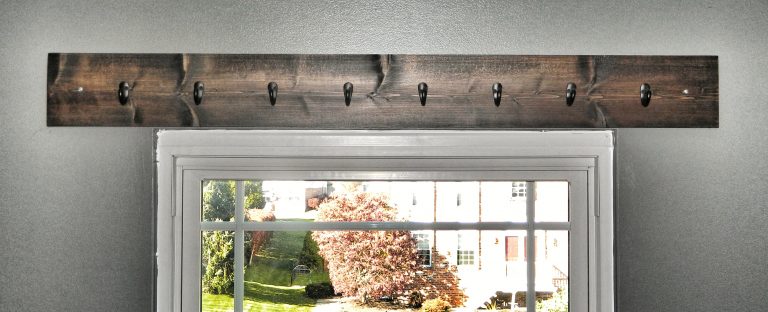
*I added 7 1/2 in. to either side of the window (15 in. total) and used a 50 in. 1×6 board. The hardware store will cut the wood for you.
instructions
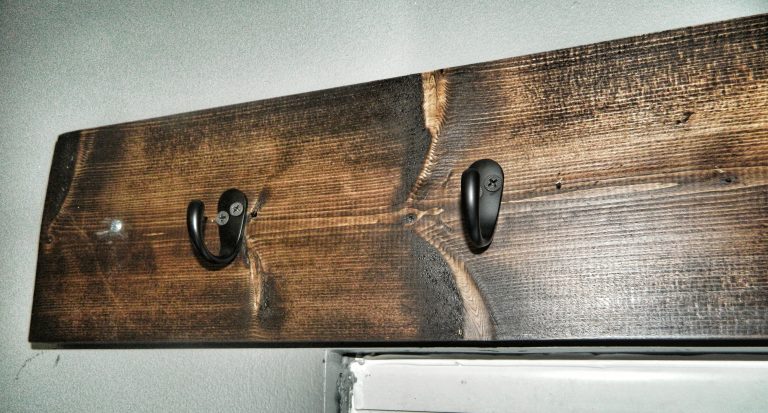
Stain your boards. Brush in long, smooth strokes to cover, then wipe offthe excess using a dry rag. Repeat until you get the desired color.
Using an appropriate Drill Bit for the screw size, drill1 hole on either end of the board (I drilled 2 in. from the end and 2 1/2 in. from the top.)
Place the Board on the wall where you want it to hang (I went as high as I could, just below the molding.) Make a mark on the wall where you drilled the holes in the board.
Remove the board and screweach Anchor into the marks using a screw driver.
Line up your board on the wall again and drill your Screws through the board into the Anchors. Repeat with the other window(s).
Measureeven spaces for the Hooks to go on the board. Depending on how many you need you will have to figure out an even distance between them. Markwhere the screws will go.
Screw in all the Hooks and hang your curtains. Step back and LOVE WHAT YOU DID!!
Did you try this project? Please share any comments or suggestions below!!