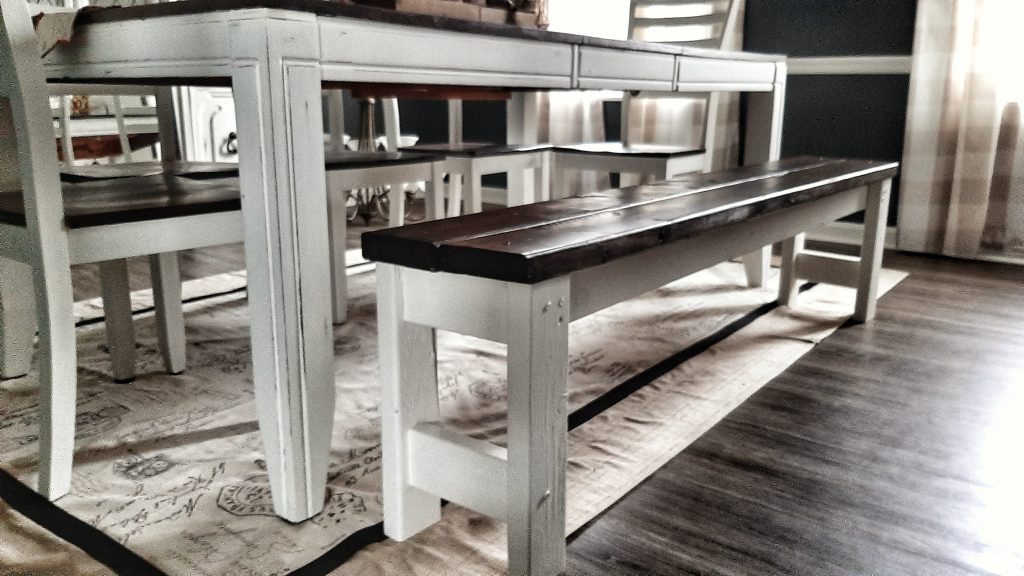
I love the look of various seating options at the dining room table – elegant chairs at the heads of the table, wooden chairs, and a bench. So when I bought my table from Craig’s List (which I completely made-over) I always planned on adding a bench. It is a Perfectly Imperfect DIY project that can be built in a few hours. You will need a helping hand to hold a few pieces for drilling, but otherwise it’s a 1 person job!!
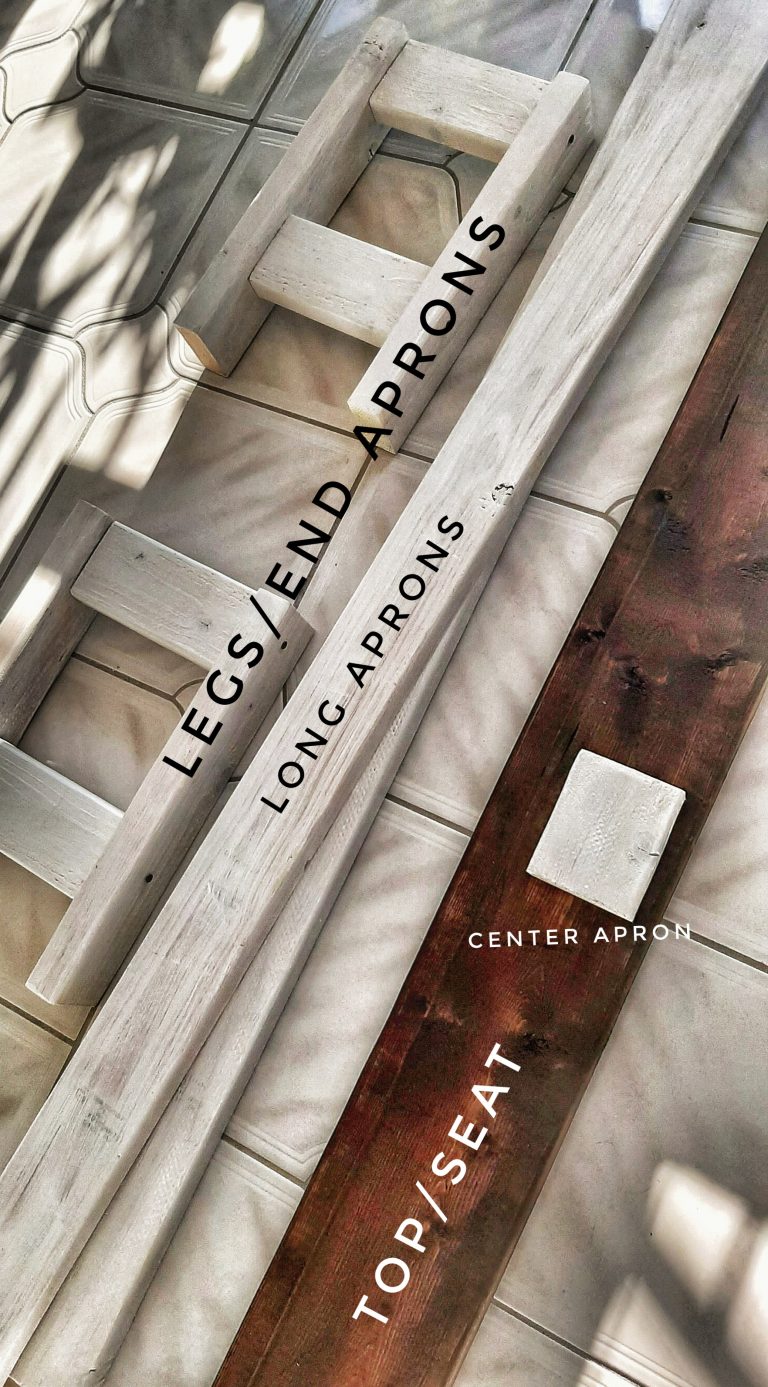
*Cut the 2x6x12 board in half at 72 in. each. These will be the top, seat boards for the bench.
**The 2x4x8 boards should be cut as follows:
Legs – 16 1/2 in. (4)
End Aprons – 7 1/2 in. (4)
Long Aprons – 66 in. (2)
Middles Apron – 4 1/2 in. (1)
You’re hardware store should be able to cut all these pieces for you! No need to have a Miter Saw.
***If you have a hand-held electric sander at home, use that and save the yourself some elbow grease, but a few sanding sponges can easily take care of any sharp edges from the boards being cut.
instructions
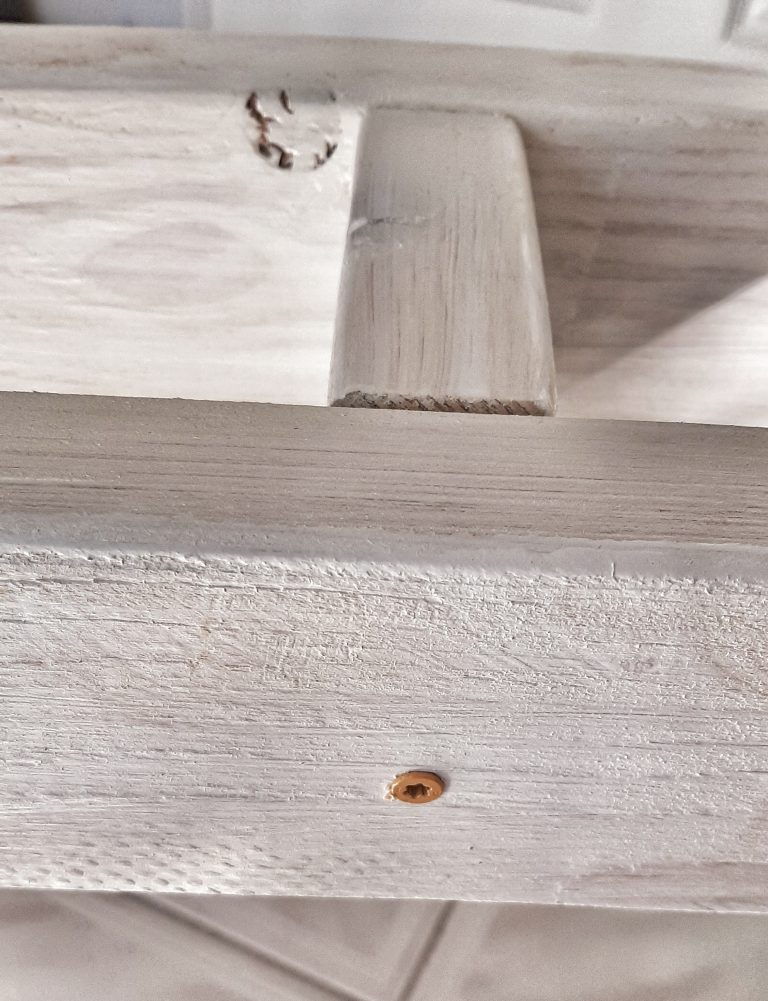
Sand all the wood’s edges and knots to make sure they are smooth. (My boards were a bit rough and splintered at the ends.)
Paint all the boards except for the top pieces (if you are doing the same look I did.) I like to use 1 coat of my favorite 3 in 1 Primer. Then 2 coats of the Chalk Paint. (Make sure to paint the last coat in smooth long strokes to prevent streaks.)
Using a clean brush, apply the Wax over all the painted boards. Then wipe offthe excess with a dry rag. Allow to dryand applya 2nd coat if you desire. Make sure to brush on the Wax over all the boards first, then wipe off with another clean rag.
Stainthe Top/Seat boards. (I applied 2 coats with a paint brush, using a dry rag to wipe off each coat to get the color I wanted.) Then apply2 coats of the Polycrylic Finish, with a clean brush, to seal your stain.
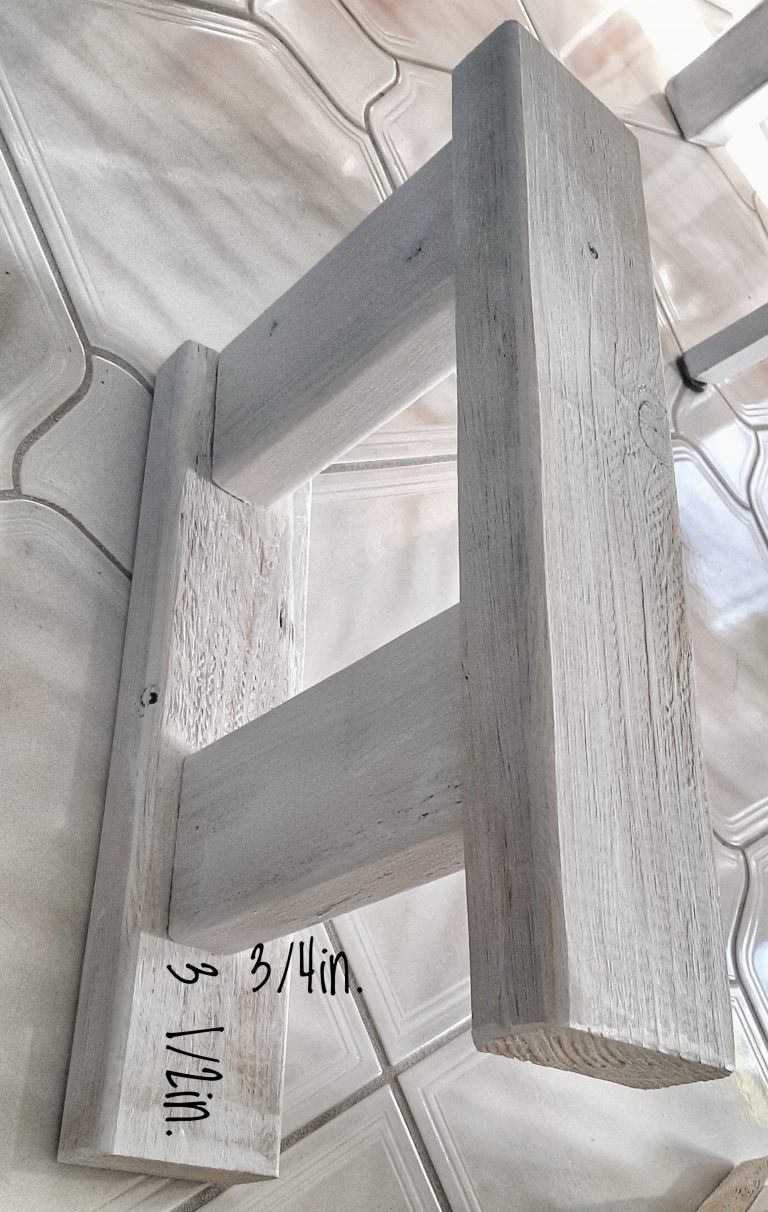
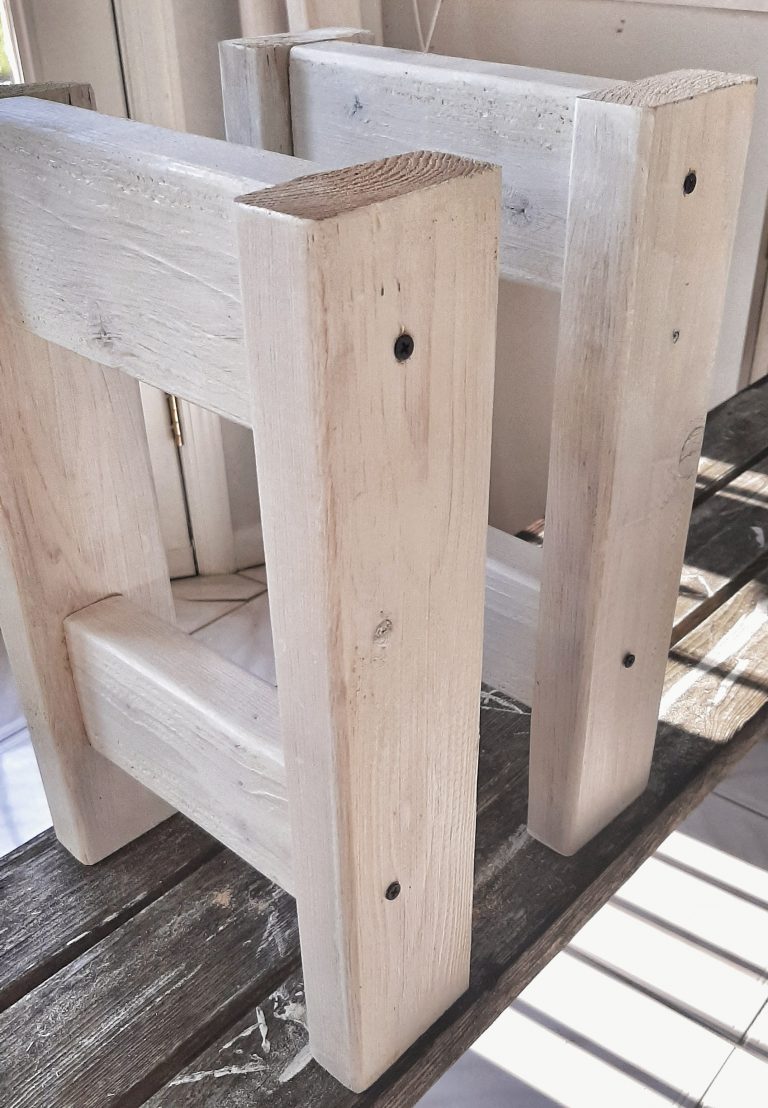
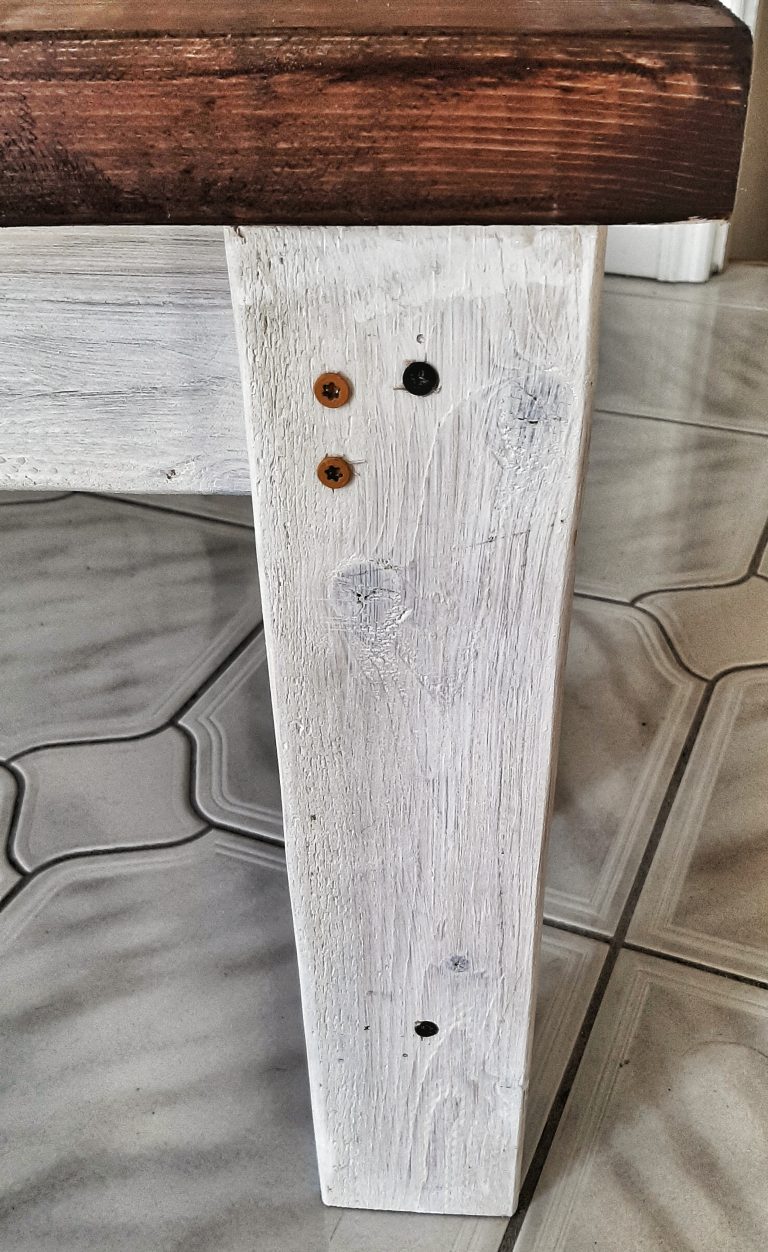
Start buildingthe bench by putting together 1 set of Legs (2 16 1/2 in. boards and 2 7 1/2 in. boards.)
Lay 1 Leg board on the floor. Mark 3/4 in. from the inner edge of the Leg for each “End Aprons” (1 Apron should be flush with the top of the Leg board and the other should be 3 1/2 in. from the bottom.) UseWood Glue to hold the Aprons to the Leg to make it easier to accurately drill in the screws. Once 1 Leg is secured, layanother Leg board down and mark3/4 in. for each Apron at the same locations as 1 first. Glue them into place and wait to dry.
Repeatwith the other 2 Leg boards and End Aprons.
Once the 4 Legs and Aprons are secure, drill 1 screw into each end of the Aprons through the outside of Leg boards.
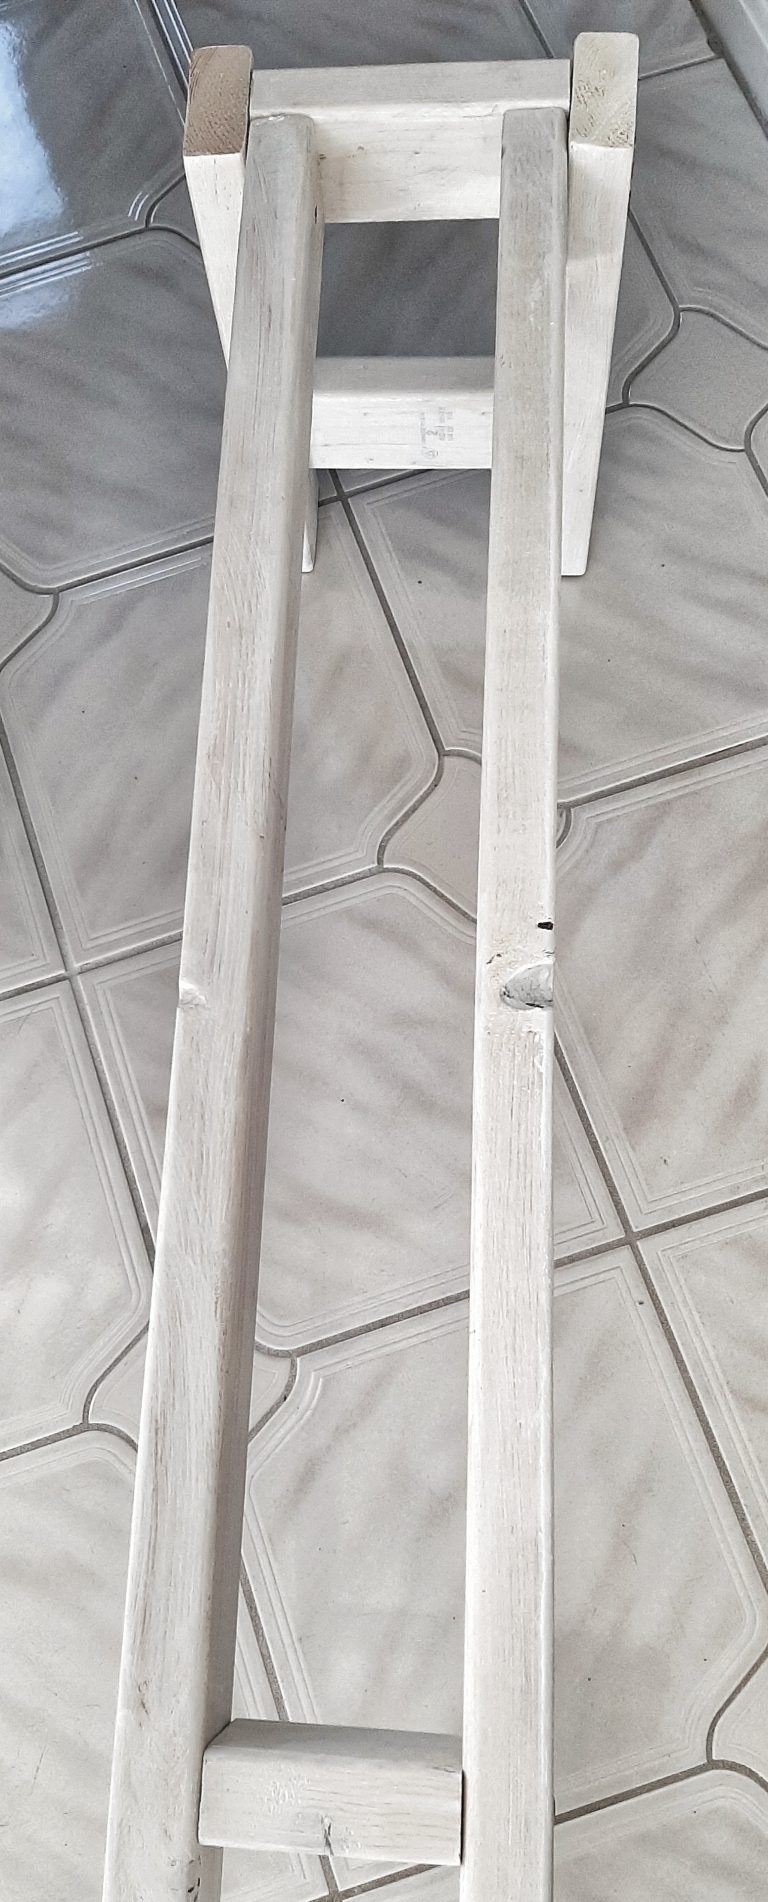
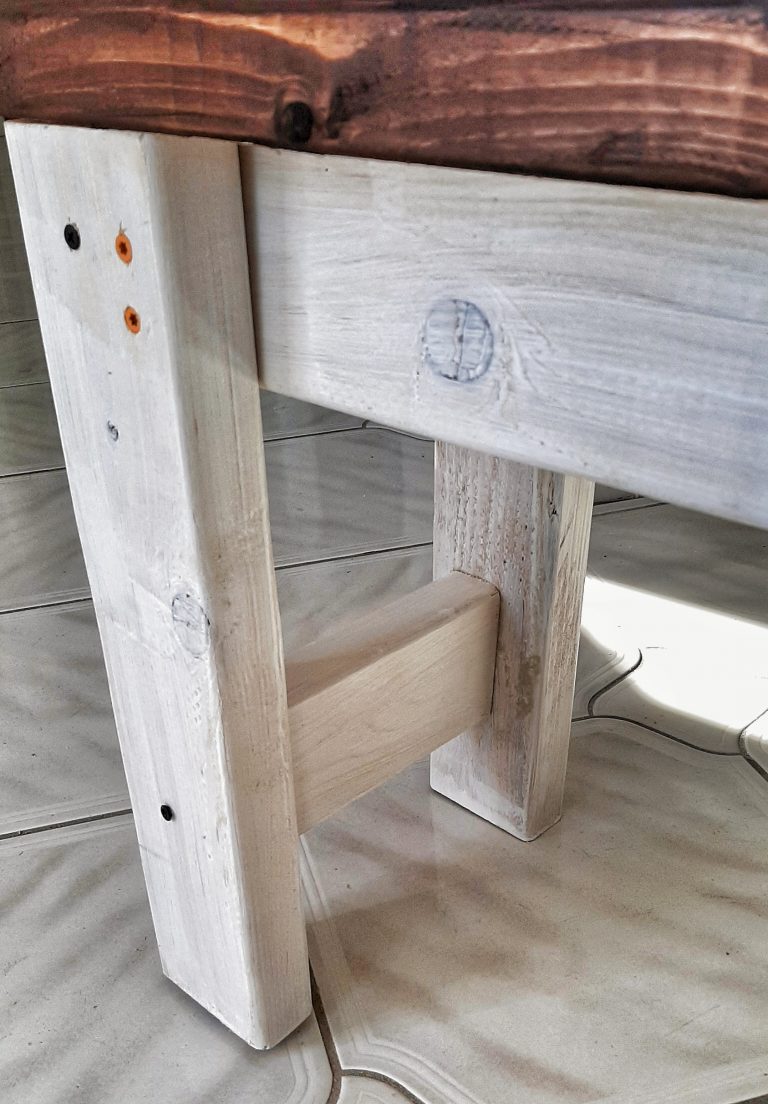
Line up 1 “Long Apron” against the top End Apron and 1 Leg (you will need assistance with these steps.) It is easiest to lay the Legs on the floor and stand the Long Apron upright. Drill2 screws from the outside of the Leg straight into the Long Apron.
Repeat with the 2nd Long Apron on the other Leg of the SAME side of the bench (if you secure one Apron to both ends first you won’t be able to get the other Apron in.)
Now repeat steps 9 and 10 at the other end.
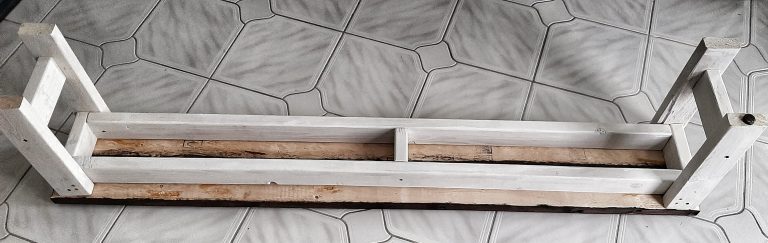
Placethe “Center Apron” between the Long Aprons at the center of the bench. Drill 1 screw into each end through the outside of the Long Aprons.
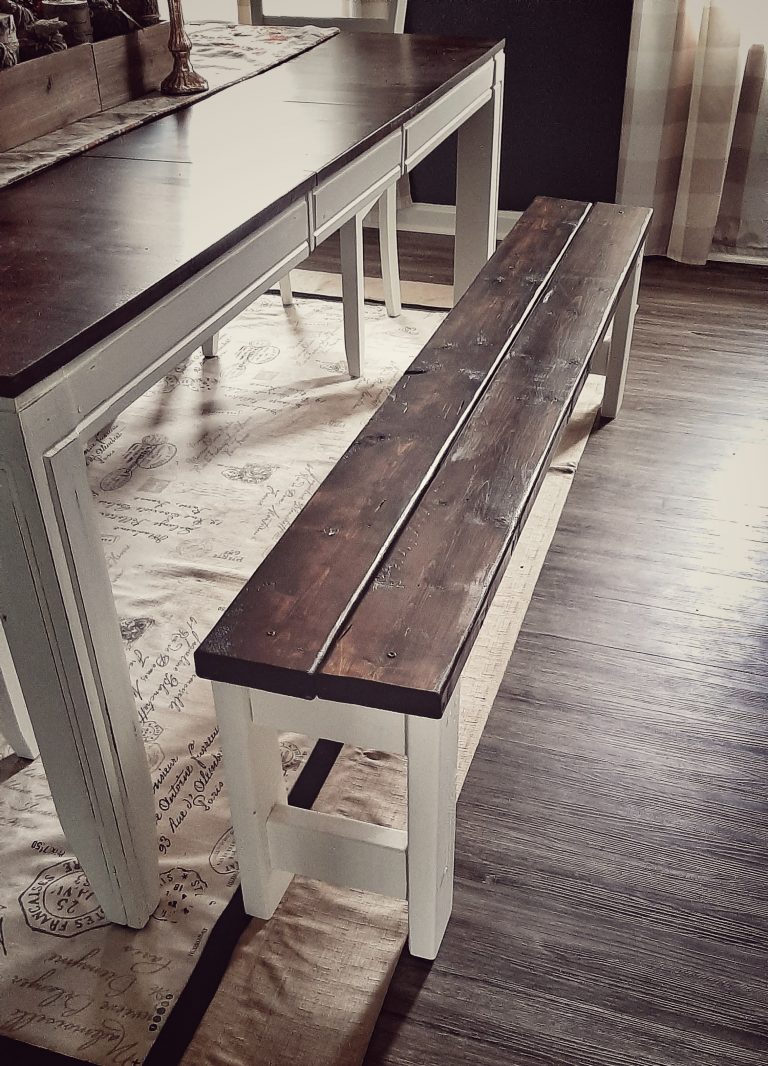
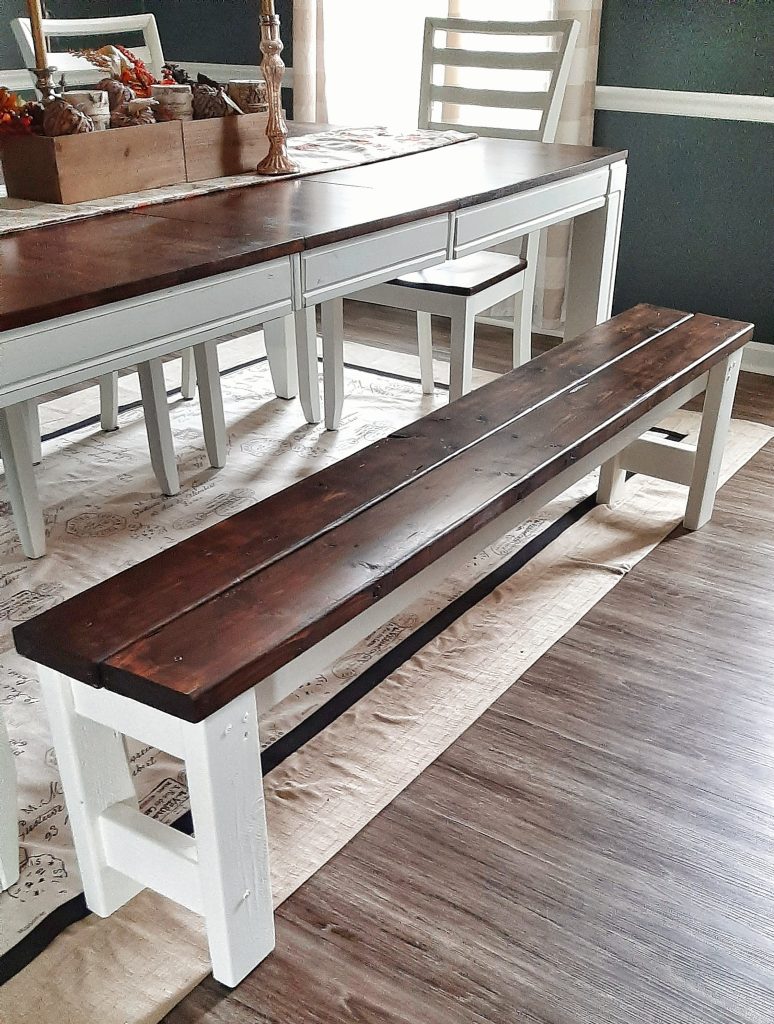
Place the Top/Seat boards on the bench’s base. Line them up so that they hang about 1 in. over the base on either side. There will be less than 1/4 in. overhang off the front and back of the base as well.
Drill 1 screw into each end of both boards straight into the top End Aprons (2 1/4 in. from the top edge and 2 3/4 – 3 in. from the outer edge).
Pat yourself on the back because you just build your own beautiful Farmhouse bench!!
*If your Legs are not completely even and your bench wobbles, place furniture pads under 1 or more of the legs to make it level. I needed 2 pads for 1 leg, which leveled my bench perfectly.
Did you try this project? Please share any comments or suggestions below!!